Disney Subway Art!
Disney Subway Art!
This idea has been in the back of my mind for some time now, and I finally sat down this weekend and created it. I’m excited to find the perfect place to hang it in my own home!
Can’t you just hear the music of the afternoon parade and smell the fresh baked waffle cones from the Main Street ice cream parlor?
Head over to my Etsy shop to check it out!

Old Posts = No Pictures :(
Welcome to all my new subscribers! I hope you stick around to see what’s on my blog– unfortunately, a few weeks ago, Webshots.com (which used to host all my pictures) got bought out by a new company and the new company did not transfer any of the pictures over (forget “sad face” I need my angry eyes here!). So I have an approximately 3 year period on this blog where the pictures are not showing up. I now have to go dig in my old hard drives to find these pictures and re-upload them. Grrrr.
So don’t get discouraged– hopefully within the next month, I’ll slowly but surely get all those pictures back up.
I apologize for any inconvenience!
My favorite scene from Toy Story– Mrs. Potato Head packing Mr. Potato Head’s angry eyes….just in case! I need my angry eyes!

Brown Sugar “Cake-ookies”
I’m out visiting my fiance right now out in Washington. We have a cute little apartment together, and while it is “ours”, it’s still really “his”. (I almost wrote “bachelor pad”, but that would be unfair because he generally keeps it clean, and isn’t that what bachelor pads are known for? Being a gross mess of dirty toilets, empty pizza boxes and clothes strewn everywhere….). I say it’s still “his” because if it were really ours, the kitchen would be fully stocked– gadgets, appliances, and a whole cabinet devoted to baking supplies so that I could bake when the mood strikes. Alas, we have to wait until we’re married (or really– until after the shower) to really fully stock our kitchen.
Today, however, the mood struck me to bake. We’ve both been trying to eat healthy to slim down for our wedding, and because such, there is not a sweet item in the house. Not one. Nada. Zippo. I decided to make some cookies based on the items I could find. I opened up the cabinets and found a ton of brown sugar, (We use it in meat recipes– and I guess we keep buying new boxes without realizing we have some at home), so the brown sugar was the basis for my recipe. I loosely based it off of a recipe I found on Pinterest, but had to change it up quite a bit to make some exchanges for ingredients we actually have on hand.
It worked out well in the end though, because these are some of the most unique cookies…or “cake-ookies” I’ve ever made! I call them cake-ookies because they have the consistency of cake, but in a bite sized cookie. They are by no means a healthy cookie, but since they’re light and airy, they almost feel as if they are!

Without further adu….the recipe!
Ingredients:
1/3 c. butter, softened
1/3 c. margarine, softened
1-1/2 c. brown sugar, packed
2 eggs
1 t. vanilla extract
2-1/2 c. all-purpose flour
1/2 t. cornstarch
1 t. baking soda
1/2 t. salt
1 c. sour cream
Directions:
In a microwave safe bowl, soften the butter and margarine in the microwave for about 10 seconds. Add both eggs and mix well. (I used a wisk because we don’t have a mixer yet). Add vanilla and beat well. Sprinkle the baking soda, cornstarch and salt on top and mix once again. Mix in the sour cream. Slowly add in the flour until all ingredients are well blended. (I switched to a wooden spoon at this point).
Chill dough for 30 minutes.
Heat oven to 350 degrees. Line a cookie sheet with foil (preferably the nonstick kind, but if you don’t have that you can just rub a stick of butter on top of the foil to make it non-stick).
Place tablespoon sized balls of dough onto the foil about 2″ apart and bake for 8-10 minutes. The edges of the bottom should just be turning a light golden brown and the tops will feel springy or squishy. Transfer to a cooling rack to cool.
Frosting:
We still had a lot of brown sugar left, so I made a frosting (although– these cookies are good even without it!). I microwaved 1 tablespoon of margarine until it was melted, and then stirred in 1/2 cup of brown sugar. I added a splash of milk until it was a nice consistency– not too drippy, but runny enough that I could spread it. Spread a small amount onto each cooled cookie and allow frosting to harden before placing in an air tight container.
This recipe made about 5 dozen cookies– I baked half of them and I froze the other half (already formed into balls) because it’s just the two of us and we’d never eat that many cookies before they go bad! Now in a week or so, I can bake the other half.
New Items to the Etsy Shop
I hate being away from my blog for so long! Especially when I miss an entire month! December and January flew by, and I can’t believe it’s already February! I’m going to start catching up by showing off two new items to my Etsy Shop (click the word “Etsy” to go see them!). The first has me counting down the days until summer– it’s a simple metal stamped bracelet that says ‘beach bum’. Ahhhhh….I miss the feel of the sand between my toes!


The second is straying a bit from the usual in my shop, but I’ve grown to love the inifinity bracelet that is sold by Tiffany & Co., so I bought some infinity charms and made my own knock off version. I get lots of compliments when I wear mine and someone even mentioned that they had the same one from Tiffany’s and they were floored when I told them I made it myself! 

Gingerbread House ~ 2012
Here is 2012’s version of our Gingerbread House– 27 years of making one! To see last year’s, click here. This year we decided to stick with a red/green/white theme–


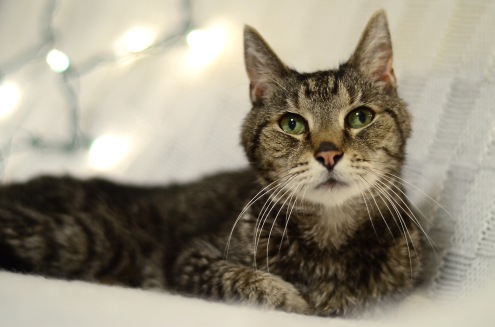
Funny story– at first, I set up the gingerbread house in front of the christmas tree to use the light bokeh as a backdrop, but I thought it was too busy. So I set up a white blanket on the couch and draped it with some white lights. About halfway through my gingerbread “photo shoot”, my cat decided that the lights looked like a comfy place to nap, so he jumped up and settled in– thankfully, he curled up into a little ball and is blocked by the house in most of the pictures, but I just had to take a few pictures of him when I was done.
I also did end up playing with the lights on my tree– even though Christmas isn’t even here yet, I’m already dreaming of summer!
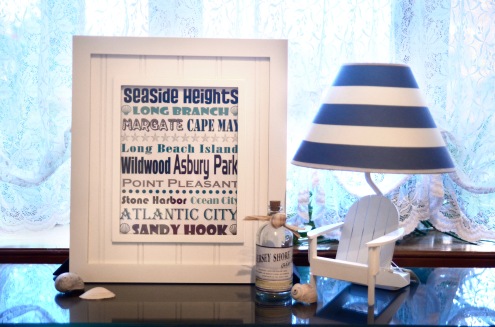
Subway Art
Lately, I’ve gotten into creating Subway art – you can buy these here in my Etsy shop.
This is the first one I made– all Jersey Shore towns!
Then I ventured into Photography….

And finally a Christmas one!

I’m thinking next up will be a Disney one– any other ideas?
Inappropriate Elf on the Shelf
When I saw that the hysterical blog Baby Rabies was having an “Inappropriate Elf on the Shelf” contest, the gears started turning in my head– if anyone can come up with something inappropriate, it’s myself and my fiance! When I saw the prizes for first second and third (a Nikon 4/3 camera– that I’ve had my eye on!, an iPad mini and Nintendo 3DS), I practically begged my fiance to come up with something for us to enter. Over the course of the week, I’d get random texts from him with various ideas– which ranged from funny to “50 Shades of Grey” levels of inappropriate. The rules specifically state that you can’t have anything above a PG-13 level, so we went with one of his ideas….a spoof on the song “Call Me Maybe”.
My sister even got in on the fun and came up with these lyrics:
“Hey, I just met you; and oh mylanta; here’s my number; so call me, santa!”
Without further adu, my Elf on the Shelf, sitting in a bathroom stall with some “for a good time, call….” graffiti that he wrote 🙂
Call me, maybe?

And onto the important thing– VOTING!!
Click the link here, scroll down until you see my picture, and click the little “Like?” button below it.
Thanks in advance!!
New Metal Stamped Items
Just some new metal stamped items that I listed to my Etsy Shop! Click Hereto see everything!
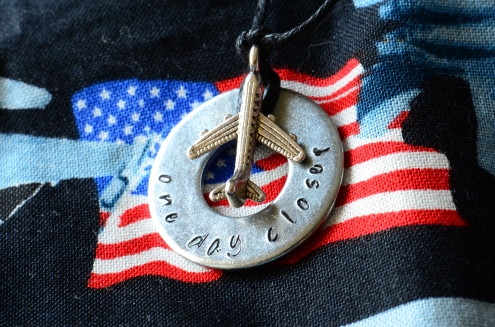
First up is a necklace I made for myself, but loved so much I decided to list it – “One Day Closer” with an airplane charm.
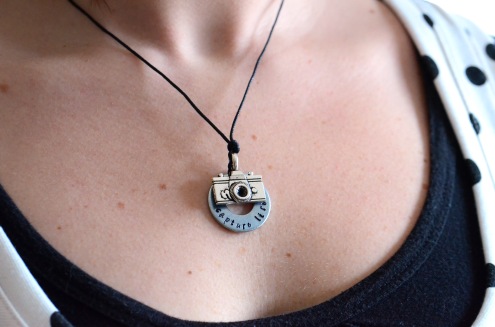
Next is a photographer necklace that says “Capture Life” with a camera charm

I also made a photographer keychain that says “Smile!” with the same camera charm


And last, I had to remove my Jersey Strong bracelet because it apparently was a copyrighted phrase, so I replaced it with a bracelet that says “Jersey Shore”

Let me know what you think!
Care Package #2 – 12 Days of Christmas
I already posted Care Package #1 here and I mentioned that I was stoked to share my second care package!
Like I mentioned in my other post, my fiance will be deployed for the holidays. We celebrated his birthday, Halloween and Thanksgiving before he left, and decided to save our anniversary and Christmas for when he returns. But– I just can’t let Christmas go by without sending him something! He said he really didn’t want anything because he was afraid he wouldn’t have room for it on the way home, so I tried to send a lot of food/snack items or things that he could share so it wasn’t a lot to bring home. I didn’t just want to load up a box and ship it off, so I came up with a “12 Days of Christmas” theme. I sent him 12 individually wrapped gifts, each corrisponding to its numbered day. He will be instructed to only open one item a day for the 12 Days of Christmas.
My favorite item that I’m sending is this– I found this cute little soldier snowman, and I painted on the USAF logo to personalize it.

Honestly– how cute is that? I am so in love with it!
Here’s an overview of everything I sent (followed by an explination below it)

The 12 Days of Christmas:
1- One snowman decoration
2- Two fuzzy socks
3- Three Rutgers golf balls
4- Four cans of Play Doh (to share!)
5- Five Monster granola bars (his favorite trail mix in a granola bar form)
6- Six pack of gum
7- Seven pack of chocolate almonds 100 calorie packs (his favorite almonds!)
8- Eight life savers
9- Nine kisses (hershey kisses)
10- Ten reasons I love him (not pictured– I typed them up, and then wrapped them around a plastic candy cane filled with M&M’s)
11- Eleven pictures of us in a photo album
12- Twelve candy canes
So see? Mostly food or stuff he can share– and what he does have to take home is small. I wrapped it all up with glitter tissue paper and labled them with cute 12 Days of Christmas tags I found on Pinterest.
I also went to the dollar store and got a cute stocking and wrote his name and the Air Force logo on it with glitter, and put some of the smaller packages in it.
Here’s everything wrapped up and ready to go!

And finally– I couldn’t send a plain care package, so I covered the inside of the box with wrapping paper, and threw in a few other little things (some holiday Reeces and Snickers bars, a Christmas rubix cube, etc) and packed it all up!

I’m hoping we can use Face Time when he’s opening some of these gifts so I can see his reaction. He usually waits until we Face Time to open stuff so its like I’m there with him. I hope he loves it all!
ETA: I grabbed some screen shots of him opening his gifts! So far he loves the stocking, the snowman and socks!


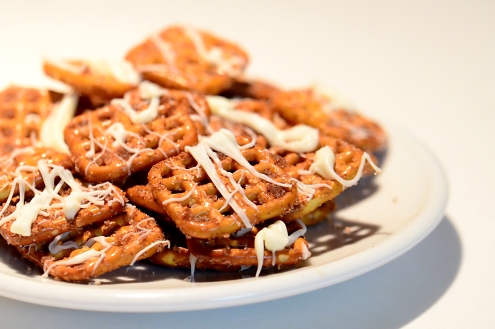
Cinnamon Pretzels
I keep seeing recipes on Pinterest to make cinnamon pretzels, and they always look so good! Today, I decided to use all the recipes I saw and tweak them to make my own.
This recipe also added some drizzled white chocolate on top– what could be more perfect?
Cinnamon Pretzels:
Ingredients:
One 16 oz bag of Pretzels (most recipes I saw suggested using the lattice shaped ones as they hold the most cinnamon)
4 T butter
1/2 cup sugar
2 T cinnamon
Plus an additional 1/2 sugar and 2T cinnamon for sprinkling on top
Optional:
1/2 to 1 cup of chocolate wafers (I like using Wilton brand)
1T oil
In a large microwave-safe bowl, melt the 4 T of butter. Add in the 1/2 cup of sugar and 2T of cinnamon and stir until well mixed. Pour the bag of pretzels into the bowl, taking care to hand scoop out the last few pretzels so you don’t get all that added salt and pretzel bits that are always at the bottom of the bag. Mix pretzels until they are well coated. Place bowl into microwave and heat for 30 seconds. Remove and stir well. Repeat this two more times.
Cover a cookie sheet with waxed paper or foil. Pour half the mix of pretzels and arrange so they are in a single layer. Sprinkle with 1/4 of the remaining sugar and 1T of the remaining cinnamon. While they cool on the cookie sheet, melt the chocolate wafers in a microwave safe bowl. Depending on the brand you use/the type of chocolate you use, this can take anywhere from one to a few minutes. Remember to remove and stir every 30 seconds so the chocolate doesn’t burn. When the chocolate is melted, stir in 1T of oil to make it runnier. Using a fork, “flick” the chocolate onto the pretzels. Allow to cool until chocolate is hard to the touch. Store in an airtight container. Repeat the sprinkling of the remaining sugar and cinnamon and chocolate step with the other half of your pretzels.
Warning: These babies are addictive! My sister and I literally ate a whole plate of them last night.
They would make a great mid-afternoon snack, but I’m thinking of taking it a step further and packaging them up for some Christmas gifts!
